
Hydroponics for beginners doesn’t have to be complicated. You don’t need a greenhouse, expensive equipment, or years of gardening experience to start growing fresh lettuce, herbs, and other plants without soil. With a simple setup and a basic understanding of water, nutrients, light, and pH, you can build a small hydroponic garden right at home.
And you don’t need a greenhouse or an expensive commercial setup to get started.
A small hydroponic garden can fit on a kitchen counter, shelf, windowsill, or in a spare corner under a grow light. Some beginner systems require little more than a container, nutrient solution, and a few plants, while larger setups can be expanded as you gain experience.
If you’re completely new to hydroponics, terms like pH, EC, nutrient solution, DWC, NFT, and grow media can make the process seem more complicated than it really is. You don’t need to master all of them before growing your first plant.
In this beginner’s guide, we’ll walk through how to start hydroponics at home step by step, including the equipment you actually need, beginner-friendly systems and plants, nutrients, lighting, pH, basic maintenance, and the mistakes worth avoiding.
By the end, you’ll know what you need to set up your first hydroponic garden and keep your first crop growing.
What Is Hydroponics and How Does It Work?
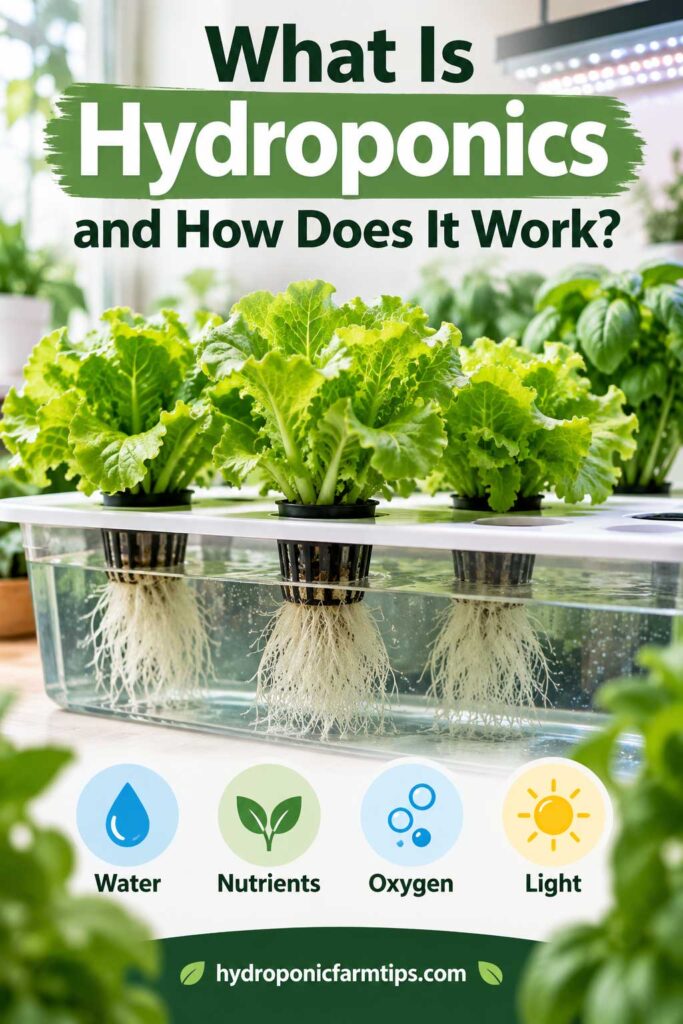
Hydroponics is a method of growing plants without traditional garden soil. Instead, plant roots receive the water, oxygen, and mineral nutrients they need through a carefully managed nutrient solution.
Depending on the hydroponic system, the roots may sit directly in nutrient-rich water, hang in a moist air space, or grow in an inert medium such as coco coir, perlite, or clay pebbles. These materials help support the plant but don’t provide nutrition in the same way fertile soil does.
In a traditional garden, roots spread through the soil searching for water and available nutrients. In hydroponics, you bring those resources directly to the root zone.
A basic hydroponic setup usually provides plants with four things:
- Water to keep the plant hydrated
- Nutrients containing essential mineral elements
- Oxygen around the roots
- Light from the sun or a suitable grow light
The goal isn’t simply to keep plant roots sitting in water. Roots still need access to oxygen, and the nutrient solution needs to stay within a suitable pH range so plants can take up nutrients efficiently.
Do Hydroponic Plants Really Need No Soil?
Yes. A true hydroponic system doesn’t rely on soil to feed the plant.
However, many systems use a soilless growing medium to hold seedlings or support the roots. Rockwool, coco coir, perlite, and clay pebbles are common examples.
Think of the growing medium as the plant’s support structure rather than its food source. The nutrients primarily come from the water.
Why Can Plants Grow This Way?
Plants don’t actually require soil itself to survive. What they need are the resources soil normally helps provide: water, mineral nutrients, oxygen around the roots, and physical support.
Hydroponics simply supplies those necessities without relying on soil. It also gives you direct control over things like nutrient strength, pH, lighting, and water quality.
It may sound technical at first, but a beginner hydroponic garden can be surprisingly simple. You don’t need to understand every type of system before getting started. The first decision is choosing a setup that matches your space, budget, and how much maintenance you want to do.
Why Start a Hydroponic Garden at Home?
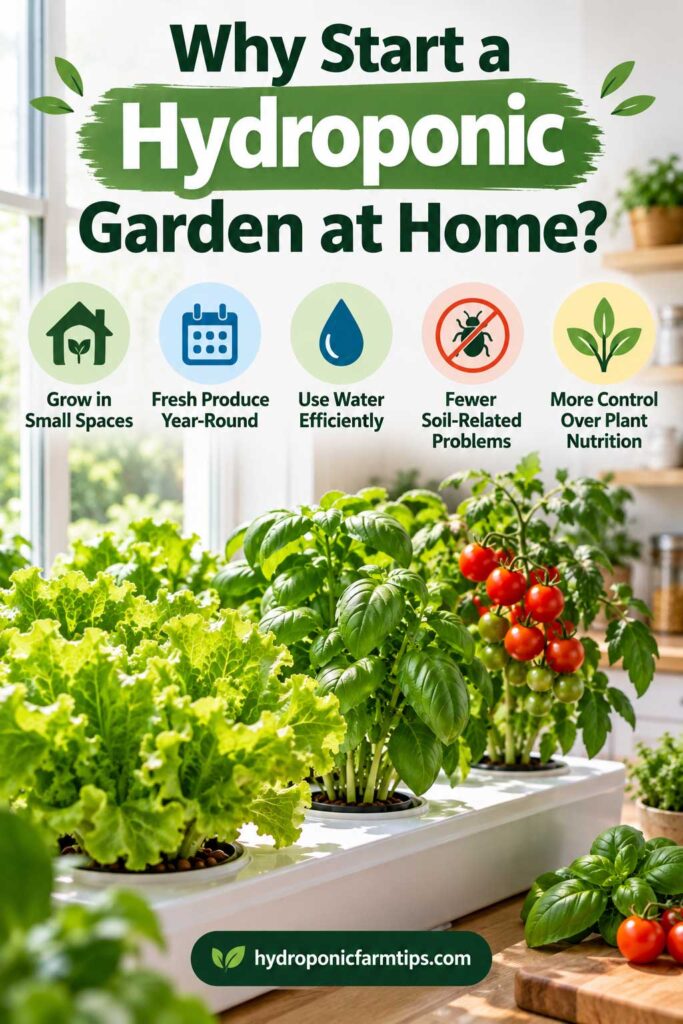
Hydroponics isn’t automatically better than growing in soil, but it offers several advantages that make it especially useful for indoor gardeners and people with limited outdoor space.
For home growers, the appeal is often flexibility. You can grow in places where a traditional garden isn’t practical and create more consistent conditions indoors.
Grow in Small Spaces
You don’t need a backyard to grow hydroponically.
A small system can fit on a kitchen counter, shelf, balcony, or dedicated indoor growing rack. This makes hydroponics practical for apartments, condos, and homes where traditional gardening space is limited.
Leafy greens and herbs are particularly well suited to compact systems.
Grow Fresh Produce Year-Round
Outdoor gardens are limited by seasons, frost, heat, and changing daylight hours. Indoor hydroponics gives you much more control over growing conditions.
With adequate lighting and suitable indoor temperatures, you can grow crops such as lettuce, basil, and other herbs throughout much or all of the year.
Use Water Efficiently
Many hydroponic systems recirculate or retain water rather than allowing it to drain into the surrounding soil.
Actual water use depends on the setup. Evaporation, leaks, and reservoir changes still use water, but a well-managed recirculating system can be very efficient because much of the solution stays within the system.
Fewer Soil-Related Problems
No soil means no pulling weeds from your hydroponic reservoir.
It also removes many problems associated specifically with garden soil, including certain soil-borne pests and diseases. Hydroponic plants can still develop pests, diseases, algae, and root problems, so the system isn’t maintenance-free.
More Control Over Plant Nutrition
With hydroponics, you decide what goes into the nutrient solution.
You can monitor nutrient concentration and pH and adjust them as plants grow. This extra control is one of hydroponics’ biggest advantages, but it’s also one of the skills you’ll learn as a beginner.
Fortunately, you don’t need to chase perfect numbers every hour. For a small home system, regular checks and a simple routine are usually far more important than constantly adjusting the reservoir.
It’s Easy to Start Small
Perhaps the best reason to try hydroponics is that you don’t have to build an elaborate garden on day one.
Start with a few lettuce plants or herbs in a simple system. Learn how the water, nutrients, roots, and lighting behave. Once you’re comfortable keeping a handful of plants healthy, you can decide whether you want to expand.
A few healthy plants will teach you the basics faster than a large setup with dozens of things to monitor.
Best Hydroponic Systems for Beginners
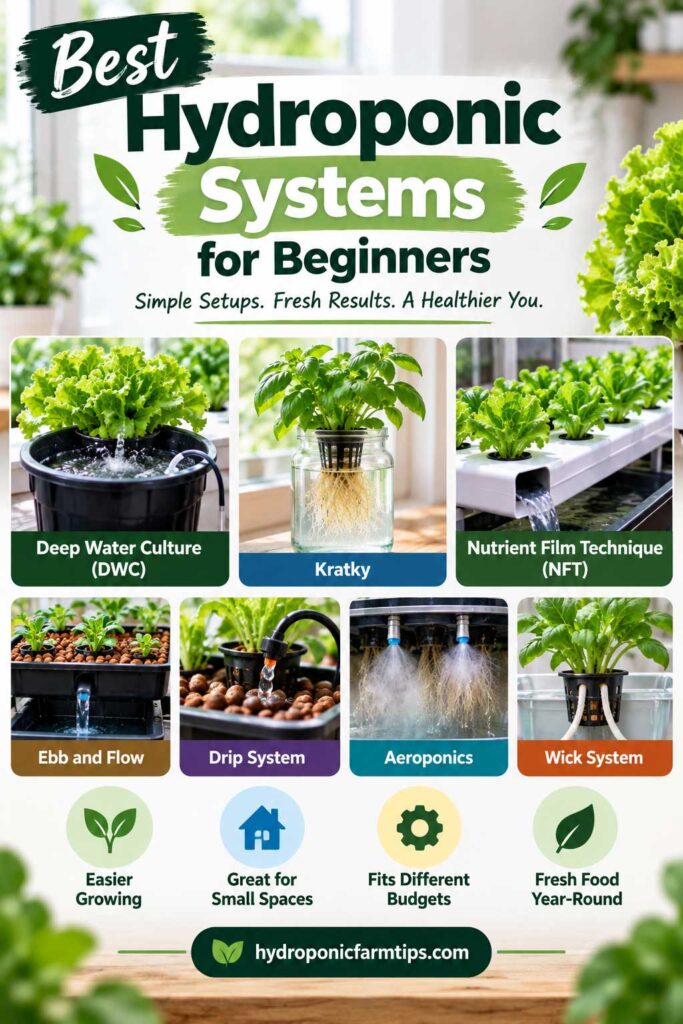
When it comes to hydroponics for beginners, choosing a simple system can make the learning process much easier.
For your first garden, look for a system that’s simple to assemble, easy to maintain, and forgiving when you’re still learning.
Three systems stand out for beginners.
If you want to compare all the major options before choosing, see our 8 Best Hydroponic Systems for Home, including DWC, Kratky, NFT, drip, aeroponics, and more.
1. Kratky Method — Simplest Place to Start
The Kratky method is one of the easiest introductions to hydroponics because it doesn’t require a water pump or air pump.
Plants sit above a container filled with nutrient solution. As they consume the solution, the water level gradually drops and part of the root system becomes exposed to the humid air inside the container. This air space helps provide oxygen to the roots.
A basic Kratky setup may require only:
- A light-proof container with a lid
- Net pots
- Growing medium or starter plugs
- Hydroponic nutrients
- Water
- A way to test and adjust pH
- Seeds or seedlings
Kratky works particularly well for smaller, relatively fast-growing crops such as lettuce and many culinary herbs.
Its simplicity is the main attraction. There are no pumps running continuously and very few moving parts that can fail.
However, Kratky isn’t ideal for every crop. Large, long-lived, or heavy-feeding plants generally require more attention and may be easier to manage in an active hydroponic system.
2. Deep Water Culture (DWC) — Best for Learning the Basics
Deep Water Culture, usually shortened to DWC, is another excellent beginner system.
In DWC, plant roots extend into a reservoir containing nutrient solution. An air pump connected to an air stone continuously adds oxygen to the water.
A basic DWC system typically includes:
- Reservoir or bucket
- Lid
- Net pot
- Air pump
- Airline tubing
- Air stone
- Growing medium
- Hydroponic nutrients
DWC introduces you to several important hydroponic skills—maintaining a reservoir, checking pH, mixing nutrients, monitoring roots, and managing oxygen—without requiring complicated plumbing.
Lettuce, basil, and other leafy greens are good choices for a first DWC garden.
3. Wick System — Simple and Low Maintenance
A wick system is another passive form of hydroponics.
Instead of using a pump, one or more absorbent wicks draw nutrient solution from a reservoir into the growing medium around the plant’s roots.
Wick systems can be inexpensive and easy to build, but they deliver nutrients relatively slowly. That makes them better suited to smaller plants with modest water and nutrient demands.
They generally aren’t the best choice for thirsty, fast-growing fruiting crops such as mature tomatoes.
What About NFT, Drip, and Aeroponics?
You may also come across Nutrient Film Technique (NFT), ebb and flow, drip systems, Dutch buckets, and aeroponics while researching hydroponics.
All of these can work extremely well, but they introduce additional equipment or management considerations. Pumps, timers, tubing, water flow, emitters, and larger reservoirs can create more variables to troubleshoot.
There’s nothing wrong with starting with one of these systems if you’re comfortable with the setup. But you don’t need them to learn hydroponics.
Which Hydroponic System Should a Beginner Choose?
If you want the simplest and least expensive experiment, start with Kratky.
If you want to learn the fundamentals of an active hydroponic system and don’t mind using an air pump, DWC is an excellent first choice.
If you’re growing a small plant and want a passive setup, a wick system can also work.
Don’t worry about finding the “perfect” system. Choose one that fits your space and feels manageable. You can always move to NFT, drip, Dutch buckets, or another system later.
Best Plants for Beginner Hydroponic Gardens
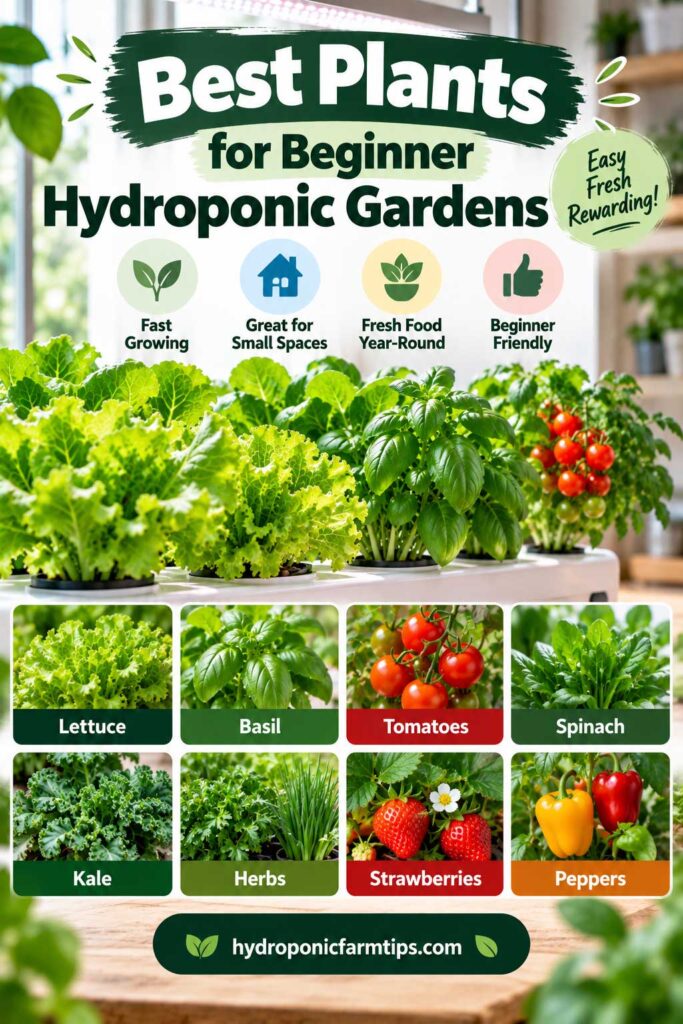
The best plants for hydroponics for beginners are usually fast-growing leafy greens and herbs that don’t require complicated support or pollination.
While you can grow everything from lettuce and basil to tomatoes, peppers, cucumbers, and strawberries hydroponically, some crops require considerably more light, space, nutrients, support, and attention than others.
Fast-growing leafy greens and herbs are usually the most forgiving choices for a first system.
Lettuce
Lettuce is one of the best hydroponic crops for beginners.
It grows relatively quickly, stays compact, and doesn’t require pollination or heavy structural support. Loose-leaf, butterhead, and romaine-type lettuces can all work well in home hydroponic systems.
Lettuce is particularly suitable for Kratky, DWC, and NFT systems.
Not sure what else to plant? Our guide to the 10 Best Hydroponic Vegetables covers more crops that work well in soilless systems.
Basil
If you’d rather start with an herb, basil is an excellent choice.
It responds well to hydroponic growing conditions and can provide repeated harvests when pruned correctly. Once established, you can harvest individual leaves or cut stems above a node to encourage bushier growth.
Basil also gives beginners experience managing a plant for longer than a single lettuce harvest.
Other Leafy Greens
After lettuce, consider trying other leafy greens such as:
- Kale
- Arugula
- Bok choy
- Swiss chard
- Mustard greens
Their exact growing requirements vary, but many leafy greens are well suited to small home hydroponic gardens.
Beginner-Friendly Herbs
Several culinary herbs can also grow successfully without soil.
Good options include mint, parsley, cilantro, chives, and oregano, although germination speed and growth habits differ between species.
For more options, see our 10 Best Hydroponic Herbs to Grow at Home.
Mint can be particularly vigorous once established, so give it enough room rather than allowing it to crowd slower-growing plants.
Can Beginners Grow Tomatoes and Peppers?
Yes—but they’re usually better as a second project.
Tomatoes and peppers are fruiting crops. Compared with lettuce and most herbs, they generally need stronger lighting, more growing space, plant support, longer growing periods, and careful nutrient management.
Indoor plants may also need help with pollination.
If your goal is eventually to grow hydroponic tomatoes or peppers, that’s completely realistic. Learning reservoir management and plant care with lettuce or herbs first simply makes the transition easier.
What Should You Grow First?
For an easy first crop, try three to six lettuce or basil plants. Keeping plants with similar needs in the same system makes lighting, nutrients, and troubleshooting much simpler.
Once you’re comfortable with those, branch out into other leafy greens, herbs, and eventually fruiting crops.
Your first garden doesn’t need to produce everything you eat. A handful of healthy plants and a successful harvest is a great start.
What You Need to Start Hydroponics at Home
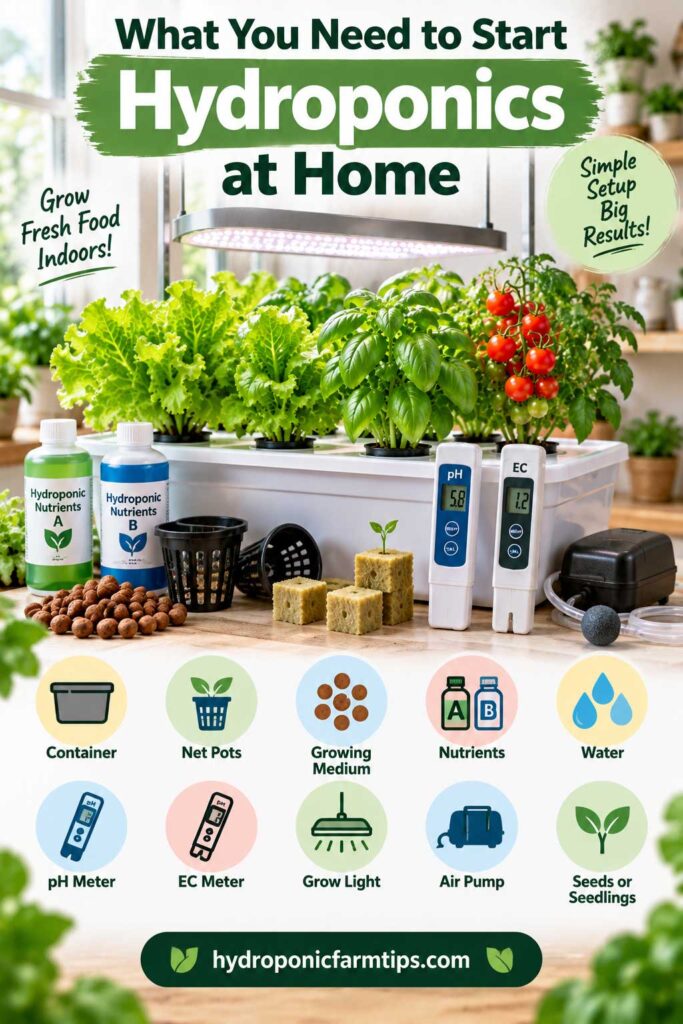
You don’t need a room full of equipment to start growing hydroponically.
The exact supplies depend on the system you choose, but most small home hydroponic gardens use the same basic components. Start with the essentials and add equipment only when it solves a real problem.
A Reservoir or Growing Container
The reservoir holds the water and nutrient solution that feeds your plants.
For a small DIY system, this might be a food-safe bucket, storage tote, or another suitable container. Purpose-built hydroponic reservoirs are also available.
Whenever possible, choose an opaque or light-blocking container. Light entering the nutrient solution can encourage algae growth.
The reservoir should also be large enough that the water level and nutrient concentration don’t change dramatically every time your plants drink.
Net Pots
Net pots are small containers with openings that allow roots to grow through them and reach the nutrient solution.
They come in several sizes, and the right size depends on the crop and system. Small net pots work well for lettuce and many herbs, while larger plants need more root and stem support.
Growing Medium
Even though hydroponic plants don’t grow in soil, many systems still need something to hold the plant upright.
Common hydroponic growing media include:
- Clay pebbles
- Coco coir
- Perlite
- Rockwool or other starter cubes
Different media hold different amounts of water and air, so the best option depends partly on your system.
For beginners, don’t overthink it. Choose a medium that works with your selected system and follow its preparation instructions.
Hydroponic Nutrients
Regular garden fertilizer isn’t necessarily formulated for plants growing without soil.
A complete hydroponic nutrient formula is designed to provide essential mineral nutrients in a form suitable for soilless growing.
Some products come as one-part formulas, while others have two or three separate components that are mixed into water in a specific order.
Always follow the manufacturer’s directions rather than assuming that more fertilizer will produce faster growth. An overly concentrated nutrient solution can damage plants.
A pH Test Kit or pH Meter
pH affects how readily plants can take up nutrients from the solution, so you’ll need a way to monitor it.
You can start with inexpensive liquid test drops or strips, although a digital pH meter is more convenient if you plan to grow hydroponically on a regular basis.
Most hydroponic crops prefer a slightly acidic root-zone pH, but the ideal range varies by crop.
Keep appropriate pH adjustment products on hand if your mixed nutrient solution regularly falls outside the desired range.
An Air Pump and Air Stone
If you’re building a DWC system, an air pump and air stone are essential parts of the setup.
The pump pushes air through tubing to an air stone submerged in the reservoir. The resulting bubbles help keep the nutrient solution oxygenated and support healthy roots.
Passive systems such as Kratky don’t normally use an air pump because they provide root-zone oxygen differently.
A Grow Light
If you’re growing indoors without enough direct natural light, you’ll need a suitable grow light.
LED grow lights are popular for home hydroponics because they come in many sizes, are relatively energy-efficient, and can provide plenty of usable light for indoor crops.
The important part isn’t simply buying the brightest light you can find. Light intensity, distance from the plants, coverage area, and daily lighting duration all matter.
If you’re choosing a fixture, our LED Grow Lights Guide explains what to look for and compares suitable options for different indoor gardens.
A Timer
An inexpensive outlet timer can automatically turn your grow lights on and off each day.
This is one of those small purchases that makes indoor gardening much easier. Instead of remembering to operate the lights manually, you can give plants a consistent light-and-dark schedule.
EC or TDS Meter
An EC meter measures the electrical conductivity of your nutrient solution, which gives you an indication of its dissolved nutrient concentration.
A TDS/PPM meter reports a related measurement using a converted parts-per-million value.
You can start a very simple garden by carefully following nutrient-label directions, but an EC meter becomes increasingly useful as you learn to manage your reservoir more precisely.
Seeds or Healthy Seedlings
Finally, you need plants.
Starting from seed gives you more variety and lets you control the plant from germination onward. Buying seedlings can save time, but plants started in soil shouldn’t simply be dropped into a hydroponic reservoir with soil still attached to their roots.
For your first garden, starting a few lettuce or basil seeds in suitable starter plugs is a straightforward option.
Beginner Hydroponics Shopping List
For a simple first DWC garden, your basic setup could be as little as:
Reservoir + lid → net pots → growing medium → air pump + air stone → hydroponic nutrients → pH tester → grow light if needed → seeds.
That’s enough equipment to get a basic DWC garden running. You can add monitoring tools or upgrade individual components later if your setup needs them.
How to Start Hydroponics at Home Step by Step
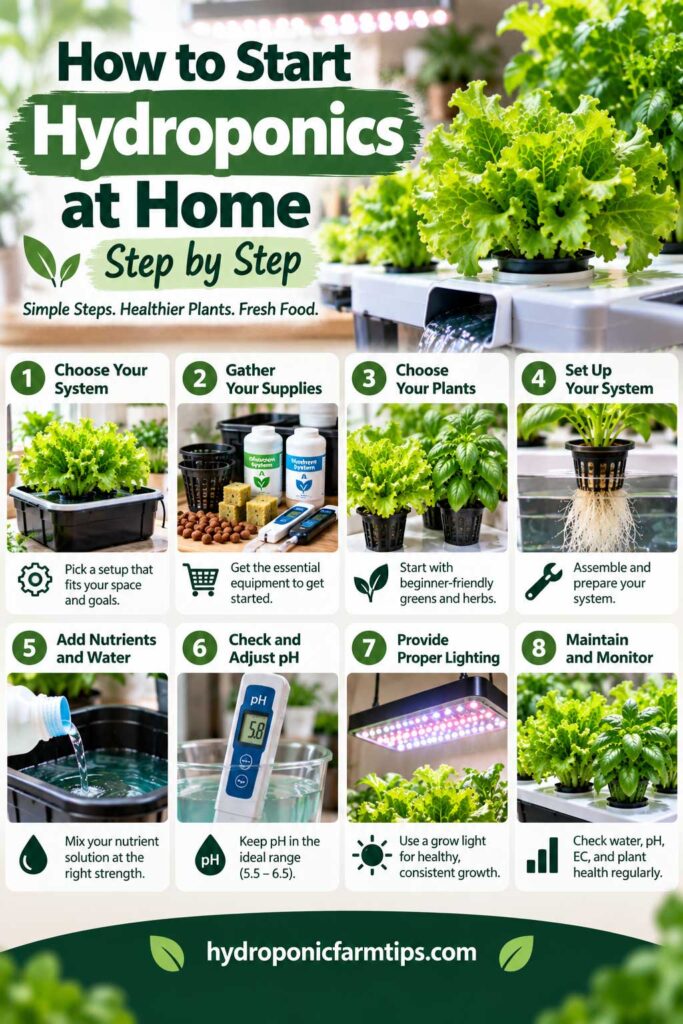
Once you’ve chosen your plants and gathered the basic equipment, it’s time to put everything together.
The details vary between hydroponic systems, but the overall process is similar. For this beginner example, we’ll use a small DWC-style setup with lettuce or basil.
Step 1: Choose the Right Location
Before filling anything with water, decide where your hydroponic garden will live.
Choose a location with:
- Easy access to electricity if you’re using pumps or grow lights
- A stable indoor temperature
- Enough room for plants to grow upward and outward
- Easy access for checking and cleaning the reservoir
- A surface that won’t be damaged by an occasional splash or spill
Avoid putting the reservoir directly beside heaters, radiators, or other strong heat sources.
If you’re relying on a grow light, you don’t necessarily need the sunniest window in the house. A controlled lighting setup can give you more flexibility when choosing a location.
Step 2: Start Your Seeds
Most beginners will find it easier to germinate seeds separately before placing them into the main hydroponic system.
Place your seeds into suitable starter plugs or another hydroponic-friendly seed-starting medium. Keep them moist according to the requirements of the crop, but don’t leave the young seedlings waterlogged.
Once the seeds germinate, provide adequate light so they don’t become tall, thin, and weak.
Wait until the seedlings are established enough to move into the system. The exact timing varies by plant, but you generally want healthy young seedlings with developing roots rather than freshly sprouted seeds with almost no root structure.
Step 3: Prepare the Reservoir
Clean the reservoir before using it and rinse away any residue.
Fill it with the appropriate amount of water, leaving enough space for the equipment and root zone required by your system.
If you’re using tap water, it’s useful to know its starting pH and mineral content. Water quality varies considerably from one location to another and can influence nutrient management.
Don’t add plants yet.
Step 4: Mix the Hydroponic Nutrients
Add your hydroponic nutrients according to the manufacturer’s instructions.
If you’re using a multi-part nutrient system, follow the recommended mixing order. Don’t combine concentrated nutrient components directly with each other before diluting them in water, because this can cause certain minerals to react and precipitate out of solution.
For young seedlings, the recommended nutrient concentration may be lower than what mature plants require.
More nutrients do not automatically mean faster growth. An overly concentrated solution can stress or damage young roots.
Step 5: Check and Adjust the pH
After mixing the nutrients, test the pH of the solution.
Many hydroponic crops perform well in a slightly acidic range, often somewhere around pH 5.5 to 6.5, although the preferred range varies by plant.
You can check crop-specific targets in our Hydroponic Nutrient & pH Chart.
If adjustment is necessary, use products designed for raising or lowering hydroponic pH and follow their directions carefully.
Add small amounts, mix thoroughly, and test again before making another adjustment.
Trying to force the pH to an exact decimal point usually isn’t necessary. Keeping it within an appropriate range is more important.
Step 6: Set Up the Air Pump
For DWC, connect the air pump to the air stone using airline tubing and place the air stone near the bottom of the reservoir.
Turn the pump on and check that you’re getting steady bubbling.
The goal is to keep the root environment adequately oxygenated—not to turn the reservoir into a jacuzzi.
Keep the electrical air pump itself outside the reservoir and follow the manufacturer’s safety instructions for placement and use around water.
Step 7: Transfer the Seedlings
Place each established seedling into a net pot and gently support it with your chosen growing medium.
Position the plant so its roots can access moisture while the crown and stem remain appropriately supported above the reservoir.
Avoid burying the stem too deeply or completely submerging the entire root system without adequate oxygen.
Handle young roots carefully. They’re surprisingly easy to damage.
Step 8: Position Your Grow Light
If you’re growing indoors, position the grow light according to the manufacturer’s recommended hanging distance and coverage area.
Too little light can produce weak, stretched growth. Too much light—or placing a powerful fixture too close—can stress or damage plants.
As your plants grow taller, you’ll probably need to adjust the light height.
Using a timer makes it much easier to maintain a consistent daily lighting schedule.
Step 9: Check That Everything Is Running
Take a quick look at the system each day. Make sure the pump and grow light are operating, the reservoir has enough water, and nothing is leaking.
Give the plants a quick inspection too. Wilting, discoloration, algae, unusual smells, or sudden changes in the roots are easier to deal with when you notice them early.
We’ll cover a simple maintenance routine below.
Step 10: Monitor pH and Nutrient Strength
Test the nutrient solution regularly, especially while you’re learning how quickly your plants use water and nutrients.
As plants grow, they’ll absorb water and mineral nutrients at different rates. This can cause both the nutrient concentration and pH to change.
An EC meter can help you monitor nutrient strength, while your pH meter or test kit tells you whether the solution remains within an appropriate range.
Step 11: Watch the Roots
Check the root zone whenever your system makes it easy to do so. You’re mainly looking for changes from what’s normal for your plants.
If the roots suddenly become slimy or mushy, the plants begin wilting, or you notice an unpleasant smell, investigate rather than waiting for the problem to correct itself.
Step 12: Harvest and Learn
Eventually, you get the best part: your first harvest.
Leafy greens may be harvested as whole plants or, depending on the crop, by removing outer leaves while allowing the center to continue growing. Herbs such as basil can often be harvested repeatedly with careful pruning.
Your first hydroponic crop doesn’t need to be perfect.
Keep track of what worked, what didn’t, and what you would change next time. Maybe your light needed adjusting, the reservoir was too small, or you discovered that six basil plants were far more basil than you expected.
That’s part of learning.
Once you’ve taken a plant from seed to harvest without soil, hydroponics stops feeling mysterious and starts feeling like gardening.
Understanding Hydroponic Nutrients, pH, and EC
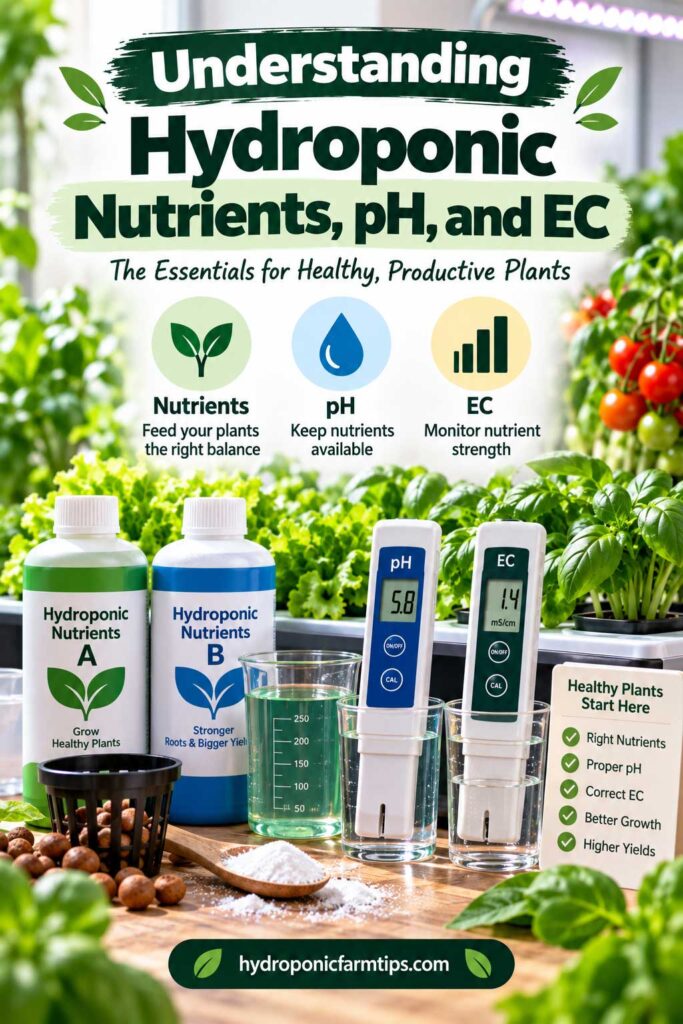
For many beginners, nutrients, pH, and EC sound like the most technical parts of hydroponics. Fortunately, you don’t need to become a chemist to manage a small home garden.
Think of them as three separate questions:
Nutrients: Is the plant getting the minerals it needs?
pH: Is the nutrient solution within a range where those nutrients are readily available to the plant?
EC: How concentrated is the nutrient solution?
Once you understand those three ideas, the numbers become much less intimidating.
What Are Hydroponic Nutrients?
Because hydroponic plants aren’t growing in fertile soil, their mineral nutrients need to come from the nutrient solution.
Plants require macronutrients such as nitrogen, phosphorus, potassium, calcium, magnesium, and sulfur, along with smaller amounts of micronutrients including iron, manganese, boron, zinc, copper, molybdenum, chlorine, and nickel.
You don’t need to purchase all of these separately.
A complete hydroponic fertilizer is formulated to supply the essential mineral nutrients plants need. Depending on the product, it may come as a single formula or as multiple components that you mix into water.
For your first garden, following the nutrient manufacturer’s recommended dosage is much easier than trying to formulate your own nutrient solution.
Why pH Matters in Hydroponics
The pH scale measures how acidic or alkaline a solution is.
In hydroponics, pH matters because it influences nutrient availability. Even when nutrients are present in the reservoir, plants may have difficulty taking up certain elements when the pH moves too far outside a suitable range.
Many hydroponically grown crops do well somewhere around pH 5.5–6.5, but there isn’t one perfect number for every plant.
That’s why crop-specific recommendations are more useful than trying to maintain every hydroponic garden at exactly the same pH.
What Is EC?
EC stands for electrical conductivity.
In simple terms, an EC meter helps estimate the concentration of dissolved ions in your nutrient solution. As you add mineral nutrients to water, conductivity generally increases.
A higher EC usually means a more concentrated solution, while a lower EC means a less concentrated one.
Different crops and growth stages tolerate or prefer different nutrient strengths. Young seedlings usually need a milder solution than large, established plants.
This is another reason not to assume that more fertilizer is better.
EC vs. PPM: What’s the Difference?
You may see nutrient recommendations expressed as either EC or PPM.
EC is the direct conductivity measurement. Many TDS meters convert conductivity into a PPM value using a conversion factor.
The confusing part is that different meters may use different conversion scales, commonly referred to as the 500, 640, or 700 scale.
That means two meters can display different PPM numbers for the same nutrient solution. Our Hydroponic Nutrient & pH Chart also includes EC-to-PPM conversions for the 500, 640, and 700 scales.
For beginners, using EC can make comparisons simpler. If you’re following a PPM recommendation, make sure you know which conversion scale is being used.
Don’t Chase Perfect Numbers
Expect your readings to move as plants grow. They won’t stay frozen at the numbers you recorded when you first mixed the reservoir.
Hydroponic systems are dynamic. Plants drink water, absorb nutrients, release compounds through their roots, and change the chemistry of the solution over time.
Small fluctuations are normal.
Instead of trying to maintain one exact pH or EC reading every minute of the day, focus on keeping the solution within an appropriate range and watching how your plants respond.
Healthy leaves, steady growth, strong roots, and consistent readings over time tell you much more than a single measurement.
Your meters are tools for understanding the garden—not numbers you need to obsess over.
Hydroponic Lighting for Beginners
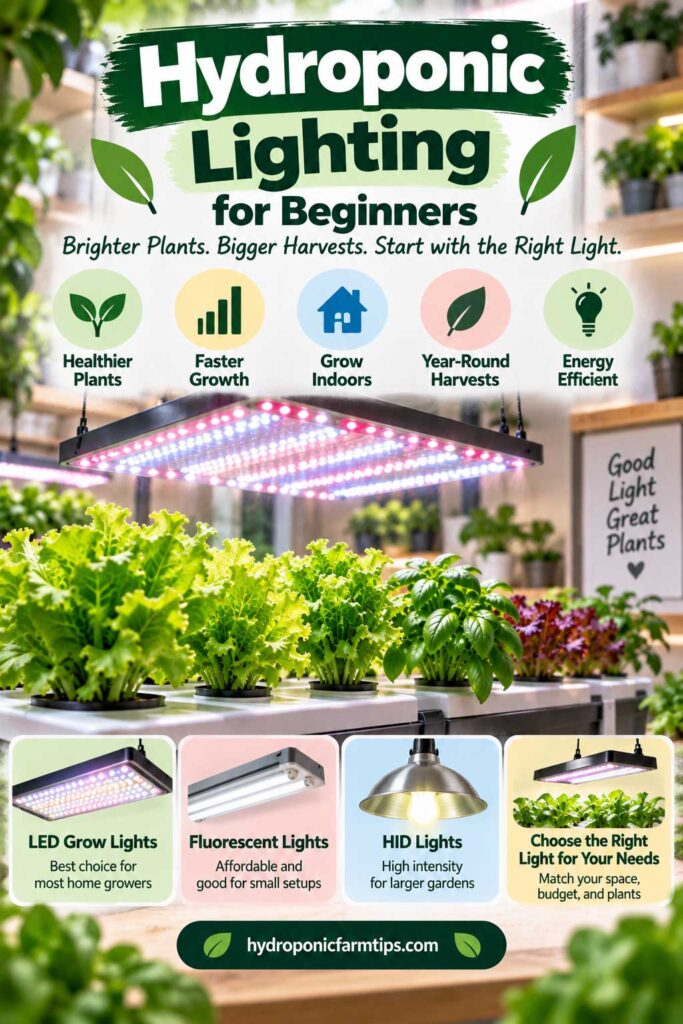
Water and nutrients get a lot of attention in hydroponics, but plants still need enough light to grow.
If your hydroponic garden is outdoors or receives sufficient sunlight, supplemental lighting may not always be necessary. For most indoor setups, however, a grow light provides much more predictable growing conditions than relying on light from a window alone.
Do You Need a Grow Light for Hydroponics?
Not necessarily—but indoor plants need enough usable light from somewhere.
A bright window may support some herbs and leafy greens, especially during sunnier parts of the year. The challenge is that window light changes with the season, weather, window direction, surrounding buildings, and distance from the glass.
A grow light gives you greater control over both light intensity and daily duration.
For a beginner growing lettuce, basil, or other leafy crops indoors, a properly sized LED grow light is often the easiest solution.
How Many Hours of Light Do Hydroponic Plants Need?
There isn’t one lighting schedule that works for every plant.
Many leafy greens and culinary herbs grown indoors are commonly provided around 12–16 hours of light per day, followed by a period of darkness.
Fruiting crops may have different lighting requirements and generally need substantially more light intensity than shade-tolerant leafy greens.
Avoid assuming that leaving your grow light on 24 hours a day will make plants grow twice as fast. Plants benefit from an appropriate light-dark cycle, and running lights unnecessarily also wastes electricity.
An outlet timer makes maintaining a consistent schedule easy.
How Close Should a Grow Light Be to Hydroponic Plants?
This depends heavily on the light.
A small LED fixture may need to sit relatively close to the plant canopy, while a powerful grow light may need considerably more distance.
That’s why universal recommendations such as “always keep your light 12 inches above the plants” aren’t reliable.
Start with the manufacturer’s recommended hanging height and coverage area for your specific fixture, then observe your plants.
Signs Your Plants May Need More Light
Plants receiving insufficient light may:
- Become tall and stretched
- Develop long spaces between leaves
- Lean strongly toward the light
- Produce smaller or thinner leaves
- Grow more slowly than expected
Seedlings are especially prone to stretching when light levels are inadequate.
If plants are reaching aggressively toward the fixture, check whether the light is powerful enough and positioned correctly.
Signs the Light May Be Too Intense
More light isn’t always better.
Depending on the crop and environment, excessive light intensity or a fixture positioned too close may contribute to:
- Leaf bleaching
- Pale areas near the top of the plant
- Upward curling leaves
- Dry or stressed-looking leaf edges
- Stress concentrated on the leaves closest to the fixture
Heat can sometimes produce similar symptoms, so don’t automatically assume every damaged leaf means excessive light.
Adjust the Light as Plants Grow
A light positioned correctly above a tiny seedling won’t necessarily remain at the right distance several weeks later.
As your plants grow upward, periodically check the distance between the canopy and fixture.
If you’re growing plants of different heights together, taller plants can also shade shorter ones. Keeping crops with similar growth habits together makes lighting easier to manage.
Focus on the Lighting Basics
You don’t need to understand every lighting measurement before growing your first lettuce plant.
Choose a grow light designed for plants and appropriately sized for your growing area. Follow the manufacturer’s starting recommendations, use a timer, and watch how your plants respond.
As you gain experience, you can learn more about concepts such as PPFD, DLI, light spectrum, efficiency, coverage, and hanging height.
For your first hydroponic garden, concentrate on three things:
Enough light + correct distance + consistent daily schedule.
Those three basics will take you a long way before you need to worry about more advanced lighting measurements.
How to Maintain a Beginner Hydroponic Garden
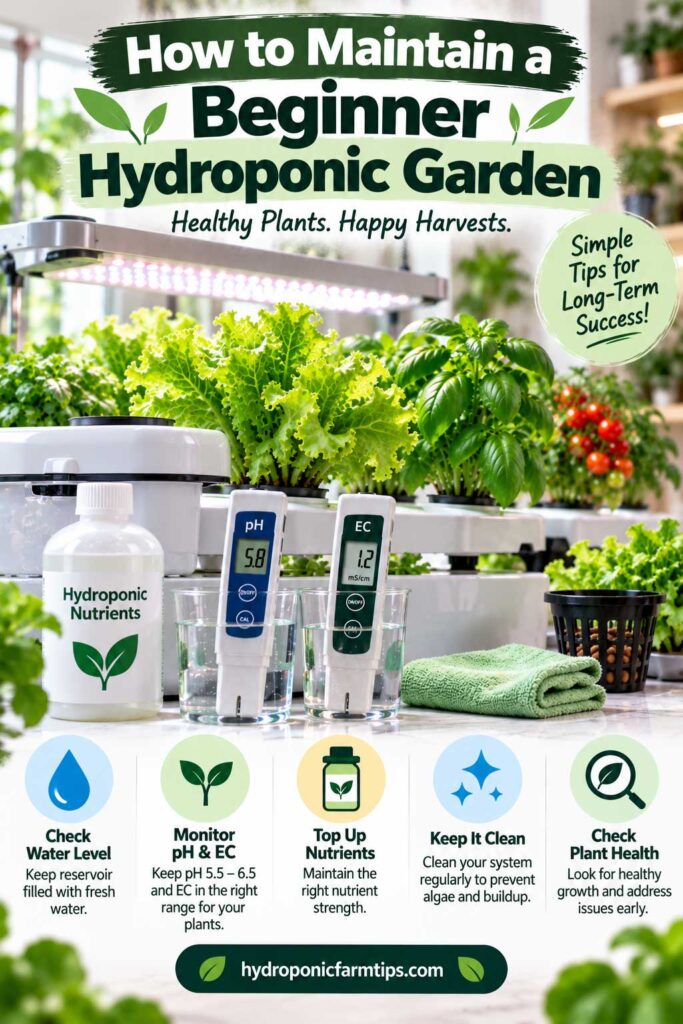
Once your hydroponic system is running, maintenance is usually less complicated than beginners expect.
You don’t need to constantly adjust nutrients or stare at your pH meter. What matters most is developing a simple routine so you notice changes before they become serious problems.
What to Check Daily
A quick visual inspection can tell you a lot about your garden.
Take a minute or two each day to check:
- Water level
- Pump and air stone operation
- Grow light operation
- Leaves for wilting, yellowing, spots, or curling
- Roots for unusual discoloration or sliminess
- Reservoir and growing medium for algae
- Plants for visible pests
- Tubing and containers for leaks
You don’t necessarily need to measure everything every day. You’re simply looking for anything that changed since yesterday.
A pump that stopped working yesterday is much easier to deal with than one you discover several days later.
Monitor the Water Level
As plants grow, they can consume surprising amounts of water.
Check the reservoir regularly and replenish it when necessary. How frequently you need to top it up depends on reservoir size, plant size, crop type, temperature, humidity, and the hydroponic system.
Don’t allow the reservoir to become so low that roots lose access to water or pumps run dry.
At the same time, don’t automatically refill every system to the very top. Some hydroponic methods rely on an air space around part of the root zone.
Check pH Regularly
Hydroponic pH can change as plants absorb water and nutrients.
Beginners may want to check it relatively frequently at first so they can learn how their particular system behaves. Once you understand its normal pattern, you can develop a routine appropriate for your setup.
If the pH moves outside the preferred range for your crop, adjust it gradually.
Avoid repeatedly adding large amounts of pH adjuster in an attempt to hit one exact number.
Keep an Eye on EC
If you’re using an EC meter, record your readings occasionally rather than simply checking the number and forgetting it.
Patterns can help you understand what’s happening inside the reservoir.
Changes in EC can give you clues about what’s happening in the reservoir, especially when you compare them with changes in water level and plant growth. Avoid diagnosing a problem from EC alone.
Top Up or Replace the Nutrient Solution?
Adding water to a reservoir and completely replacing the nutrient solution are not the same thing.
Topping up restores water that plants have used or that has been lost through evaporation. Over time, however, the nutrient balance in the reservoir can change because plants don’t absorb every mineral at exactly the same rate.
For that reason, many hydroponic growers periodically replace the nutrient solution rather than endlessly adding more fertilizer to old water.
How often you should do this depends on the system, reservoir size, crop, plant maturity, water quality, and nutrient program. Avoid treating a fixed schedule as a universal rule for every hydroponic garden.
Keep the Reservoir Clean
A clean system is easier to manage.
Remove dead leaves and plant debris before they fall into the reservoir. Wipe up spills, keep light from entering the nutrient solution where possible, and clean reusable equipment between crops.
If algae repeatedly appears inside the reservoir, check for light leaks before reaching for another treatment.
Prevention is usually easier than fighting an established algae problem.
Watch the Roots
Make a habit of looking at the roots whenever your system allows it.
Healthy roots should generally feel firm rather than slimy or mushy. Many are naturally pale, although nutrient solutions can stain them tan or brown.
If you suspect a root problem, see our Hydroponic Root Rot Guide for symptoms, causes, and troubleshooting steps.
A sudden combination of darkening roots, slimy texture, wilting, and an unpleasant smell deserves attention.
Root problems can progress quickly, so this is one area where early detection matters.
Keep Simple Growing Notes
You don’t need a complicated spreadsheet for your first hydroponic garden.
A notebook or phone note containing the date, pH, EC, reservoir changes, nutrient additions, and anything unusual about the plants can be extremely useful.
After a few weeks, you may notice patterns that would otherwise be easy to miss.
Hydroponics becomes much easier when you stop treating every change as a surprise and start learning the normal rhythm of your own system.
A few minutes of consistent observation will usually teach you more than constantly changing the reservoir whenever something looks slightly different.
Common Hydroponic Mistakes Beginners Should Avoid
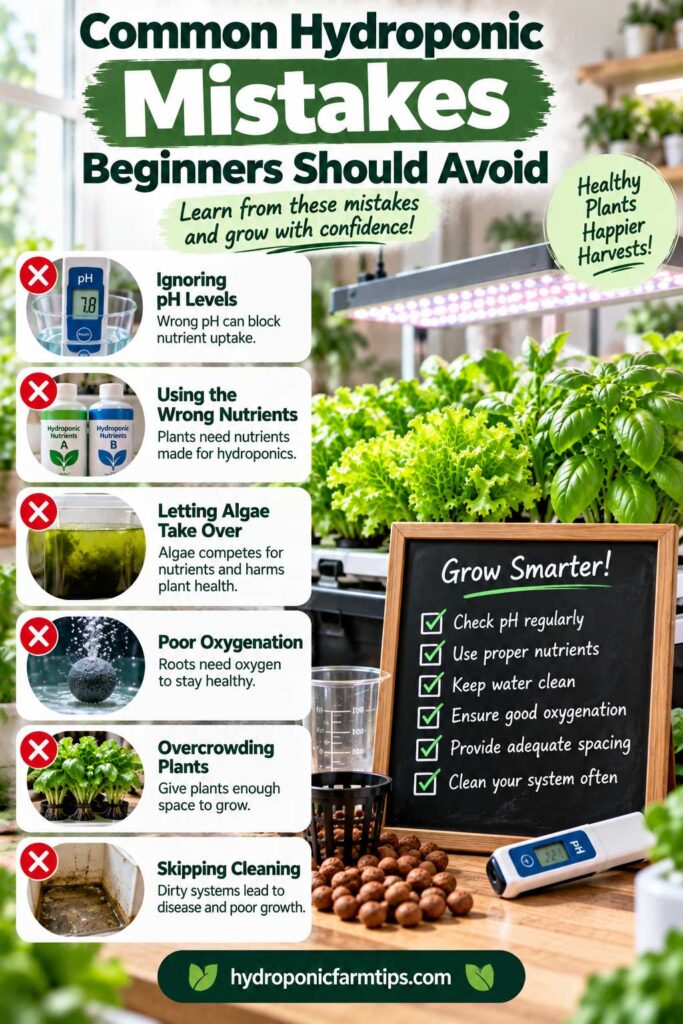
Hydroponics gives you more control over how plants grow, but that also means you’re responsible for conditions that soil normally helps buffer.
Most beginner problems aren’t caused by one complicated technical mistake. They’re usually the result of a few basic issues involving light, nutrients, pH, water, oxygen, or cleanliness.
Here are the mistakes worth watching for in your first garden.
1. Adding Too Many Nutrients
It’s tempting to think that extra fertilizer will make hydroponic plants grow faster.
It can do the opposite.
An overly concentrated nutrient solution can stress roots and contribute to leaf damage and poor growth. Young seedlings are particularly sensitive.
Start with the nutrient manufacturer’s recommendations for your crop and growth stage, and use EC measurements when appropriate rather than adding fertilizer whenever plants look slow.
2. Constantly Adjusting the pH
Some pH movement is normal. Trying to correct every small change can lead to unnecessary adjustments and make the reservoir harder to manage.
Keep the solution within an appropriate range for your crop rather than chasing one perfect number.
3. Ignoring Water Temperature
The root zone matters just as much as the leaves.
Very warm nutrient solution can hold less dissolved oxygen and may create conditions that make root problems harder to control.
Avoid placing your reservoir beside a heater or somewhere it receives unnecessary heat. Grow lights can also warm small reservoirs, particularly when the light and container are close together.
If you repeatedly experience root problems, water temperature is one of the conditions worth checking.
4. Not Providing Enough Oxygen
This is particularly important in DWC.
Plant roots need oxygen as well as water. If an air pump stops working or the root zone becomes poorly oxygenated, plants can deteriorate quickly.
Check your air pump and air stone regularly and make sure the roots aren’t simply sitting in poorly oxygenated stagnant water.
Remember that systems such as Kratky provide root-zone oxygen differently, so an air pump isn’t required in every hydroponic method.
5. Letting Light Into the Reservoir
Light plus nutrient-rich water can create excellent conditions for algae.
Clear containers may look convenient because you can see the water level, but they also allow light to reach the nutrient solution.
Use an opaque reservoir or block light from entering it. Cover unused openings around net pots as well.
If algae keeps returning, look for the source of the light rather than simply cleaning the reservoir repeatedly.
6. Using a Grow Light Incorrectly
Buying a powerful grow light doesn’t guarantee good results.
A fixture that’s too weak, too far away, or operated for too few hours may lead to stretched, slow-growing plants.
A powerful fixture positioned too close can also stress the canopy.
Follow the manufacturer’s recommendations as a starting point and adjust according to the crop and how the plants respond.
7. Growing Too Many Different Crops Together
That lettuce, basil, tomato, pepper, and strawberry garden might look amazing in your head.
Unfortunately, those plants don’t all have the same needs. Differences in lighting, nutrients, spacing, support, and growth rate can make a mixed system harder to manage.
For your first few crops, grouping plants with similar requirements makes life much easier.
8. Ignoring Early Warning Signs
Plants often show that something is wrong before they completely stop growing.
Watch for:
- Yellow leaves
- Brown or damaged leaf edges
- Curling
- Wilting
- Stunted growth
- Unusual spotting
- Slimy roots
- Algae
- Insects
Don’t immediately assume that every yellow leaf is a nutrient deficiency. Similar symptoms can result from several different problems.
Look at the entire system before making corrections.
9. Changing Several Things at Once
Suppose your basil starts looking pale.
You add nutrients, change the pH, move the grow light, replace the water, and increase the air pump—all on the same afternoon.
The plant improves three days later.
What fixed it?
You have no idea.
Unless there’s an urgent problem, change one meaningful variable at a time and observe the response. Keeping simple notes makes troubleshooting much easier.
10. Starting Too Big
A 40-plant garden creates a lot more to monitor than a six-plant garden. It also makes mistakes more expensive.
Give yourself enough plants to learn from without turning your first experiment into a full-time project.
The best beginner system is one you can understand and manage consistently.
How Much Does It Cost to Start Hydroponics?
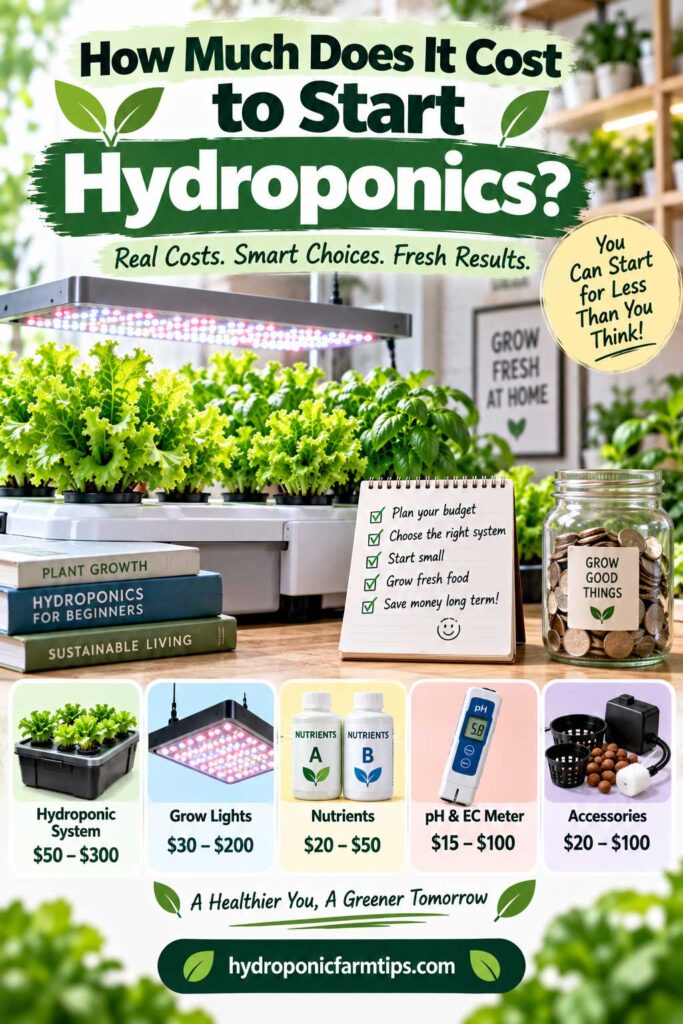
One of the good things about hydroponics for beginners is that you don’t need to spend hundreds of dollars to get started.
A small DIY system for a few lettuce plants may cost relatively little, especially if you already own suitable containers and lighting. At the other end of the spectrum, complete indoor gardens with powerful grow lights, automated dosing, environmental controls, pumps, and monitoring equipment can cost hundreds or even thousands of dollars.
For a beginner, none of that is necessary.
Budget DIY Setup
A simple Kratky garden is usually one of the least expensive ways to experiment with hydroponics because you don’t need pumps, timers, or complicated plumbing.
Your main expenses are likely to include:
- Container and lid
- Net pots
- Starter plugs or growing medium
- Hydroponic nutrients
- pH testing supplies
- Seeds
- Grow light if natural light isn’t sufficient
If you already have a suitable light-proof container, your startup cost can be quite modest.
Basic DWC Setup
DWC costs a little more because you’ll also need an air pump, airline tubing, and air stone.
However, these components are generally reusable. Once you have the basic equipment, future crops mostly involve replacing consumable supplies such as seeds, nutrients, and growing media.
Complete Countertop Hydroponic Gardens
Another option is a ready-made countertop hydroponic garden.
These systems typically combine a water reservoir, plant holders, LED grow light, timer, and sometimes water-level or nutrient reminders into one compact unit.
They’re convenient and require less DIY work, but you’re paying extra for that convenience.
Before buying one, consider the size of the growing area and the mature height of the crops you want to grow. A compact countertop garden that’s excellent for lettuce and basil may not provide enough height or root space for larger plants.
Don’t Forget the Ongoing Costs
The purchase price isn’t the only expense.
Depending on your setup, ongoing costs may include:
- Hydroponic nutrients
- Seeds
- Starter plugs or growing media
- Electricity for grow lights and pumps
- pH calibration or testing supplies
- Replacement air stones, pumps, or other components
Lighting is usually one of the more important operating costs for an indoor garden, particularly with larger or more light-demanding crops.
Where Beginners Should Spend Their Money
You don’t need premium equipment in every category.
If you’re working with a limited budget, prioritize the things that directly affect plant health and your ability to manage the system:
Reliable lighting → complete nutrients → adequate root-zone oxygen → dependable pH testing → a suitable reservoir.
Put your budget into the equipment that directly affects plant health. Fancy controllers, automated dosing, Wi-Fi monitors, cameras, and other accessories can come later.
What to Expect From Your First Hydroponic Garden
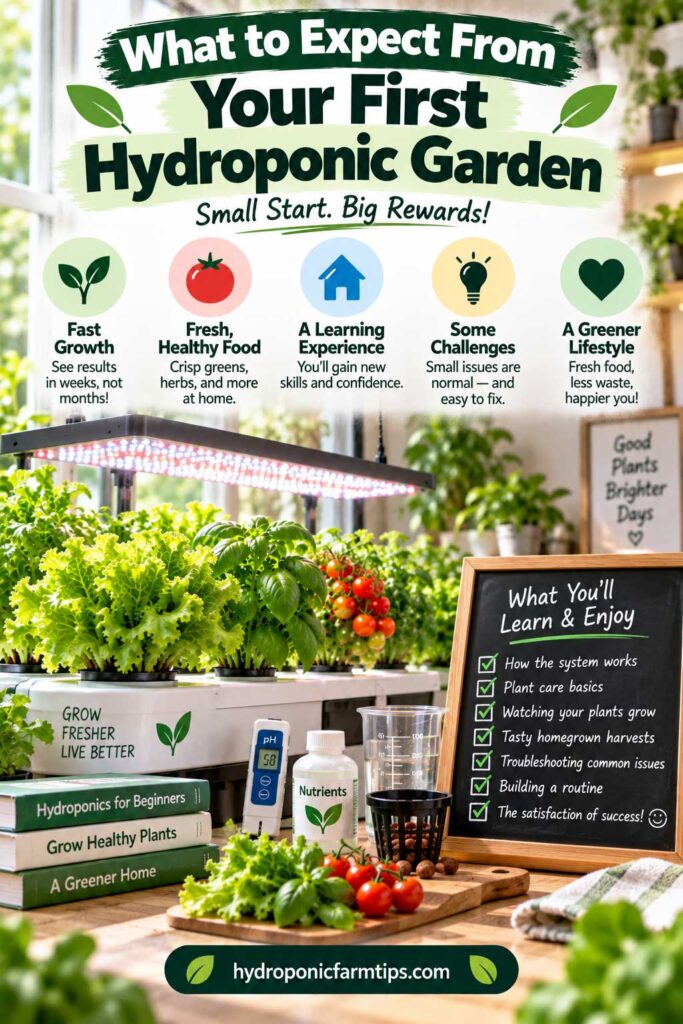
Starting your first hydroponic garden is exciting, but don’t expect to plant seeds on Monday and harvest a bowl of lettuce by Friday.
Plants still need time to germinate, establish roots, develop leaves, and mature. Hydroponics can create favorable growing conditions, but it doesn’t eliminate the plant’s natural growth cycle.
The First Week: Germination and Seedlings
Your first few days will usually be about germination.
Germination time varies with the crop, seed quality, temperature, and moisture. Some seeds pop up quickly; others make you wait.
Once seedlings emerge, pay close attention to light.
Seedlings that become unusually tall, thin, and stretched are often reaching for more light. Correcting the lighting early can help produce stronger plants before they’re transferred into the main hydroponic system.
Don’t worry if every seed doesn’t germinate. Starting a few extras gives you the option of selecting the healthiest seedlings.
Weeks 2–3: Root and Leaf Development
After seedlings become established in the hydroponic system, you’ll begin seeing more noticeable root and leaf growth.
This is a good time to observe how your system behaves.
Notice how quickly the water level drops, whether the pH tends to drift, what healthy roots look like in your setup, and whether every plant is receiving enough light.
You aren’t just growing plants during these first few weeks—you’re learning the normal behavior of your system.
Weeks 3–6 and Beyond: Faster Growth and First Harvests
For fast-growing crops such as some lettuces and leafy greens, harvest may begin within several weeks of germination, although timing varies considerably by variety and growing conditions.
Herbs such as basil can often be harvested once they’re established and have enough healthy growth to tolerate pruning.
Larger fruiting crops take considerably longer.
Avoid harvesting heavily from a small or struggling plant simply because a seed packet lists a certain number of days to maturity. Plant condition matters more than the calendar.
Your Plants Won’t Always Look Perfect
Don’t panic over every damaged leaf.
Older leaves eventually decline. Seed leaves disappear. A leaf may get damaged during handling. Minor imperfections don’t automatically mean your entire nutrient program is wrong.
Look for patterns.
One yellow lower leaf on an otherwise vigorous plant is very different from every new leaf gradually turning yellow.
Similarly, one damaged root isn’t the same as an entire root mass becoming brown, slimy, and foul-smelling.
Learning to distinguish an isolated imperfection from a developing pattern is an important hydroponic skill.
Your First Crop Is Also an Experiment
Maybe your first lettuce grows beautifully.
Maybe your basil stretches because the light was too far away.
Maybe you discover that your reservoir is annoyingly small and needs topping up constantly.
None of those results means you failed. They tell you what to adjust for the next crop.
After your first harvest, ask yourself:
- Was the system easy to maintain?
- Did the plants have enough room?
- Was the reservoir large enough?
- Was lighting adequate?
- Did pH stay reasonably stable?
- Were the roots healthy?
- Would you grow the same crop again?
- What would you change before the next planting?
Then make one or two improvements and grow another crop.
Hydroponics for Beginners FAQs
These common questions about hydroponics for beginners cover some of the things new growers often want to know before setting up their first garden.
Is Hydroponics Hard for Beginners?
Hydroponics has a learning curve, but a small system can be surprisingly simple to manage.
Start with an easy crop such as lettuce or basil and a straightforward system such as Kratky or DWC. Once you understand the basics of water, nutrients, pH, oxygen, and lighting, more advanced systems become much easier to understand.
What Is the Easiest Hydroponic System for Beginners?
The Kratky method is one of the simplest because it can operate without water or air pumps. It’s particularly useful for experimenting with lettuce and other relatively small crops.
DWC is another excellent beginner option. It requires an air pump and air stone but teaches you more about managing an active hydroponic reservoir.
What Should I Grow First in Hydroponics?
Lettuce and basil are two excellent choices.
Other possibilities include bok choy, arugula, kale, chives, parsley, and various culinary herbs.
For your first crop, choose plants with similar growing requirements rather than trying to grow several very different species in one reservoir.
Can I Start Hydroponics Without a Grow Light?
Yes, if your plants receive enough suitable natural light.
However, growing beside a window doesn’t guarantee adequate light. Light levels can change dramatically with window orientation, season, weather, and distance from the glass.
For consistent indoor production, a properly sized grow light gives you much greater control.
Can I Use Tap Water for Hydroponics?
Often, yes.
The suitability of tap water depends on its mineral content, alkalinity, pH, disinfectants, and overall quality. Some growers can use their tap water with minimal adjustment, while others may benefit from filtration or a different water source.
If you’re having persistent nutrient or pH problems, testing your source water can help identify what you’re starting with.
Can I Use Regular Fertilizer for Hydroponics?
It’s better to use a complete fertilizer formulated for hydroponic growing.
Plants grown without soil depend on the nutrient solution for essential mineral nutrients, including micronutrients that may not be adequately supplied by fertilizers designed primarily for soil.
Using a purpose-made hydroponic nutrient also makes following established mixing recommendations much easier for beginners.
Do Hydroponic Plants Grow Faster Than Plants in Soil?
Hydroponic plants can grow very quickly when light, temperature, nutrients, oxygen, water, and other conditions are favorable.
However, hydroponics doesn’t guarantee faster growth.
A healthy plant growing in excellent soil can outperform a poorly managed hydroponic plant. The main advantage of hydroponics is the ability to control many aspects of the root environment—not a guarantee of a particular growth rate.
How Often Should I Change Hydroponic Water?
There isn’t one water-change schedule that works for every system.
Reservoir size, crop, plant maturity, water quality, nutrient formula, and system design all influence how frequently a nutrient solution should be refreshed.
You’ll usually top up water between full reservoir changes while monitoring pH, nutrient concentration, water condition, and plant health.
Does Hydroponics Use a Lot of Electricity?
A basic Kratky setup doesn’t require electricity for pumps. If you’re also using natural light, the system itself may have little or no electrical demand.
Indoor systems require electricity for equipment such as grow lights, air pumps, water pumps, fans, or controllers. Of these, grow lighting is often the largest electrical load.
The actual cost depends on equipment wattage and how many hours it operates each day.
Can Hydroponic Plants Get Pests?
Yes.
Removing soil eliminates some soil-associated problems, but hydroponic plants can still attract aphids, spider mites, thrips, fungus gnats, whiteflies, and other pests.
Indoor gardens aren’t automatically pest-free. Inspect new plants before introducing them and check leaves regularly, especially the undersides.
Is Hydroponically Grown Food Safe to Eat?
Yes, hydroponically grown vegetables and herbs can be safe to eat when they’re grown and handled properly.
As with any edible garden, use suitable water and inputs, keep equipment clean, follow product directions, and wash produce appropriately before eating it.
Hydroponic production still requires good sanitation and food-safety practices because recirculating nutrient solutions and other system components can become contamination pathways.
You can also read our evidence-based look at whether hydroponic vegetables are less nutritious than soil-grown vegetables.
Can I Grow Hydroponics All Year?
Indoor hydroponics can make year-round growing possible because you have greater control over lighting and environmental conditions.
That doesn’t mean the seasons become completely irrelevant. Indoor temperature, humidity, available natural light, and heating or cooling costs may still change throughout the year.
With a suitable indoor environment and adequate artificial lighting, however, crops such as lettuce and culinary herbs can be grown well beyond the traditional outdoor gardening season.
Start Small and Grow From There
Hydroponics feels much less complicated once you have a real plant growing in front of you. The biggest lesson with hydroponics for beginners is that you learn far more once you have a real plant growing in front of you.
You don’t need to master nutrient chemistry, lighting science, or every hydroponic system before planting your first seed. Pick an easy crop, choose a manageable setup, and concentrate on keeping the basics—water, nutrients, oxygen, light, and pH—in a healthy range.
Your first crop may teach you that the light needs to move closer, the reservoir should be larger, or basil drinks far more water than you expected. That’s useful experience you won’t get from reading another ten guides.
Get the first harvest under your belt, make a few improvements, and grow again.
That’s really how you learn hydroponics.
More Hydroponic Gardening Guides You May Like
Ready to keep growing? These guides will help you choose the right crops and system, manage nutrients and pH, troubleshoot root problems, and take the next step with your hydroponic garden.
- 8 Best Hydroponic Systems for Home – Compare DWC, Kratky, NFT, ebb and flow, drip, aeroponics, wick systems, and Dutch buckets to find the right setup for your space and growing goals.
- 10 Best Hydroponic Vegetables – Discover beginner-friendly and productive vegetables to grow hydroponically and learn which systems work well for different crops.
- 10 Best Hydroponic Herbs to Grow at Home – Choose herbs that thrive in hydroponic gardens, including basil, mint, parsley, cilantro, and more.
- Hydroponic Nutrient & pH Chart – Find recommended pH and nutrient ranges for popular hydroponic crops and make reservoir management easier.
- Are Hydroponic Vegetables Less Nutritious? – Explore what research says about the nutritional quality of hydroponic produce compared with soil-grown vegetables.
- Hydroponic Root Rot: Causes, Signs & How to Fix It – Learn how to recognize unhealthy roots, understand common causes of root problems, and protect your hydroponic plants.
- How to Transfer Plants From Hydroponics to Soil – Follow a step-by-step process for moving hydroponically grown plants into soil while reducing transplant stress.
